Showing posts with label before and after. Show all posts

Saturday, July 28, 2012

Progress.

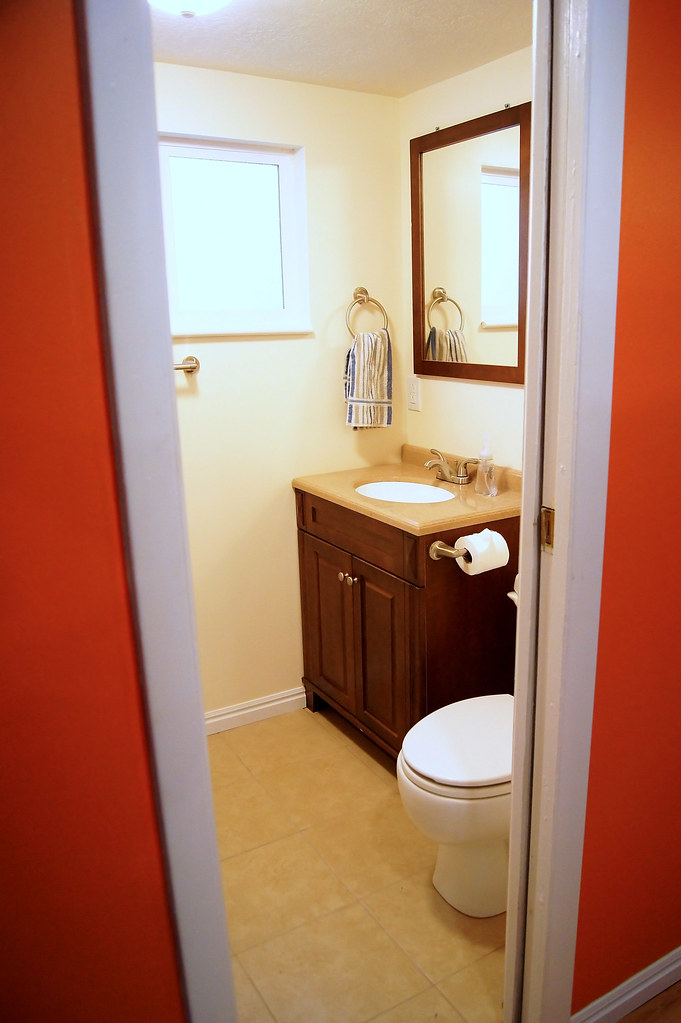
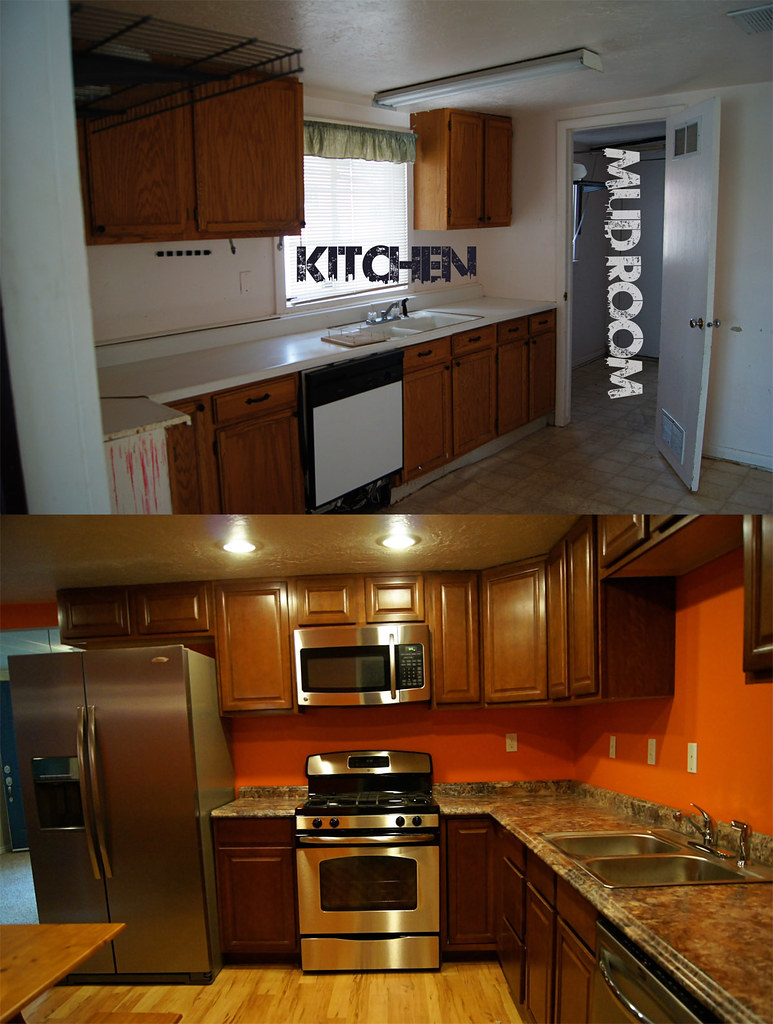
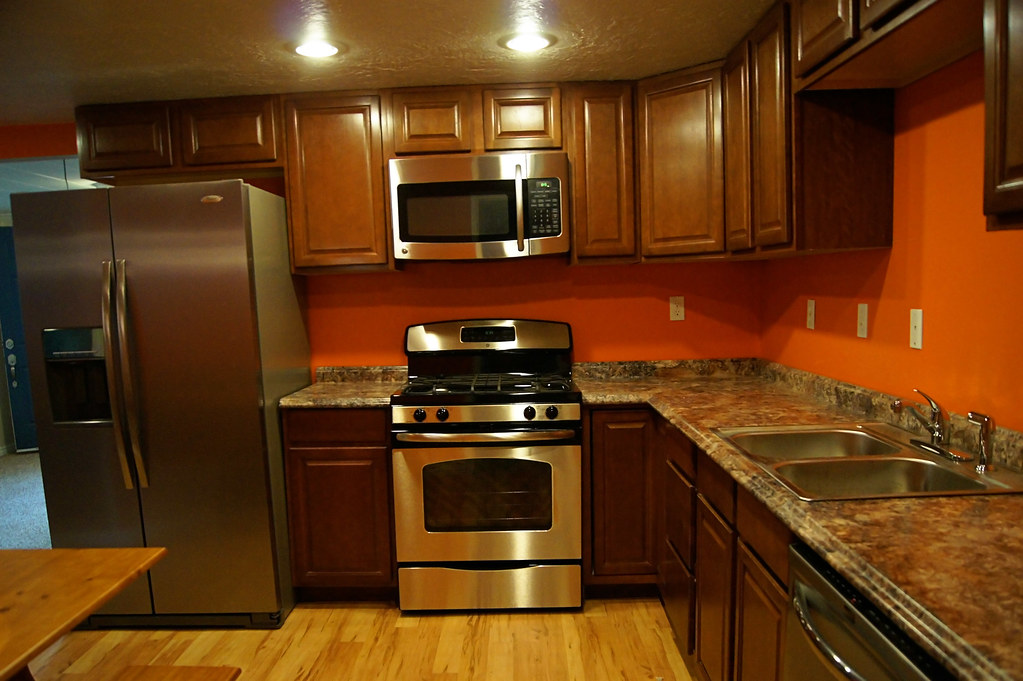
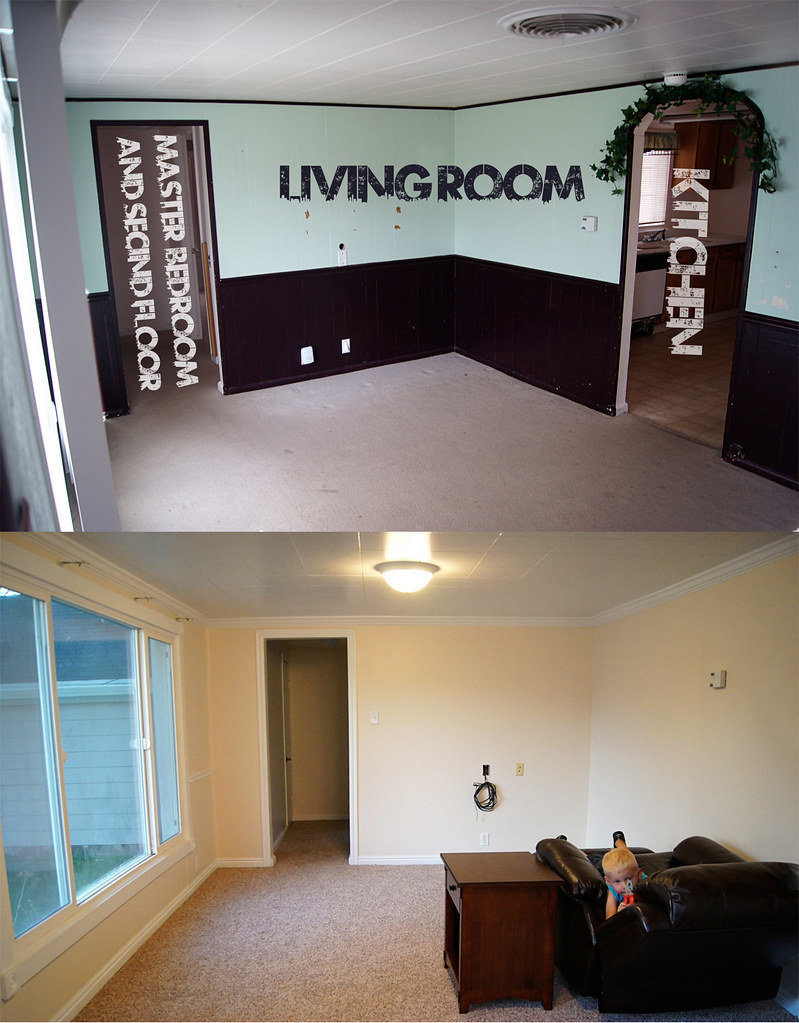
Today I thought I would share with you guys some before and after photos of our house. It has been a long hard road (mostly for our uncle THANK YOU for all the work you’ve done. seriously, you are pretty amazing!)  to get our house looking good.

Can I just tell you that I am in love, IN LOVE with my kitchen. I can see my self spending a lot of time in here not only cooking but just enjoying it.

newhouseafter2

The changes we did to the living room make it sooo much bigger and I also love the main bathroom plus I love that we now have a bathroom in our room.  awwwwwwe.after

Oh gosh while I was looking back at those awful before shots of the house it made me cringe at the thought of the people who had to live in it. Man, did it need a redo. bad.

newhouseafter4newhouseafter5

Okay Seriously, people just look at my kitchen again. Isn't it amazing! I am soooo glad we painted it orange and I am glad that I am not stuck with the old one. I would have died. seriously it was bad.

after2

I will take more photos to show the rest of it soon maybe I'll do a video tour.

Wednesday, January 25, 2012

Texture Thursday

Its Texture Thursday time!!
Everyone joining me from last week... Welcome back! And, if you're here for the first time, I hope you totally join in on the fun! The whole point of Texture Thursday is to look at photography from a different point of view. Meaning that you can either enter a photo that has texture already in it or add some of your own. If your not quite sure what I mean I give examples HERE.


This week I wanted to give you a “how to” on adding textures. When adding textures you want to make sure that you still keep your photo natural looking. You don’t want to take away from the photo. All you want is to give it depth.  Saying that is a lot simpler than actually doing it. So be careful and make sure you are using your editing eye.

disneybeforeaftertexture

You always want to start out by doing a clean edit on your photo. The better your photo is the better it will look when adding a texture.

A clean edit for me is fixing the contrast/white balance levels etc. I also took out the people that were walking. (I use the clone stamp in Photoshop to accomplish that.)

Once that was done I “placed” the brown texture I have shown below on top of my photo. I changed my “layer” to Soft light. This should make the picture show through the texture you placed on top of it. At this point you want to change the opacity to a lower percentage. ALWAYS change it at least some what because if you don’t you photo will not look natural.

You want it to look natural.

Now lets say your adding a Texture onto a portrait. You want to make sure that you erase the texture off of their skin or paint there skin with a light/dark color. Because if you don’t it will make it unnatural and that's what we are trying to avoid.

(ps if you click the photos below you can download them to use for free.)
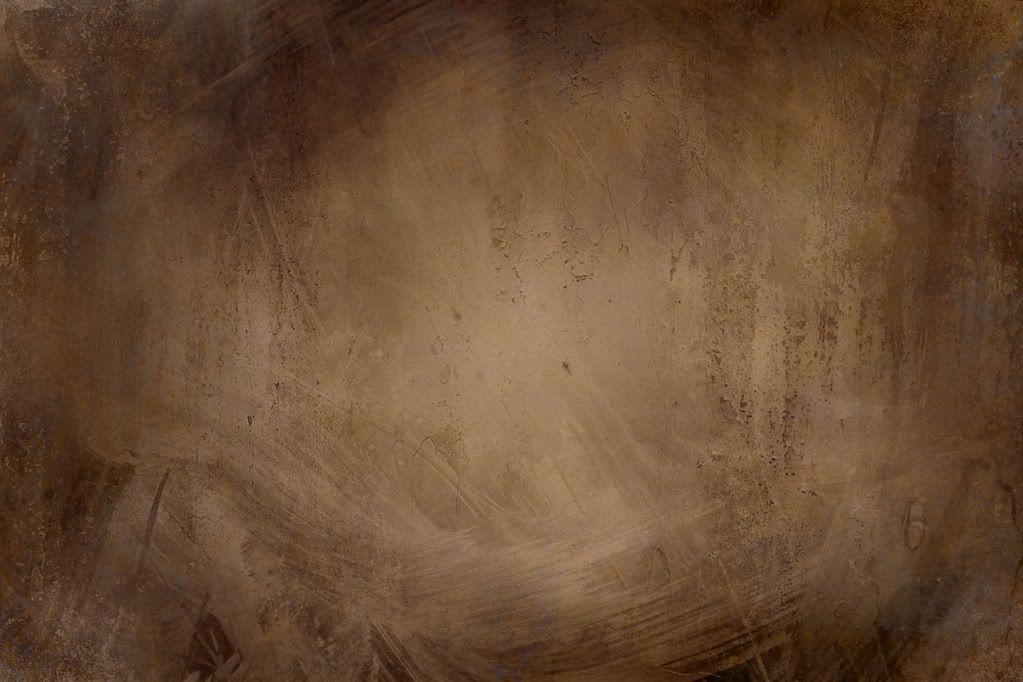
PhotobucketPhotobucket

Normally when I add texture onto buildings or landscapes I don’t erase any unless the texture looks funky on some parts of the picture. With this photo I didn't erase any of the brown texture.

Once I was done adding the brown texture I wanted to bring more depth into the sky because it was washed out. So I added some clouds (which is the above photo.) I only added the clouds to the sky part of the picture and I erased it off the buildings. I also reduce the opacity on that texture as well. Once I was done adding my textures I flattened my image and then used a action that added a little haze to the photo to give it a little more drama. I reduced the noise and was done.

disneyland8

Take your time and check your photo. I still see places on my “finished” photo that I would fix or change. Learning to add textures takes time. So don’t get frustrated.

For the rest of this week I want to give you all a challenge. Go HERE and download this photo and edit it with textures, actions or whatever and then come back next week and link it up to Texture Thursday.  Lets share our editing tips and help each other out and please if you have questions email me. I will love to help you out with anything.

I will pick the best edit and high light them the following week. I'm excited to see what you all come up with.


Any who, from now on I will be posting the winners of last week on my Texture Thursday Pinterest Page. If you are highlighted on there please make sure to grab your winner button HERE. And congrats!


Now its your turn lets see what Textures you have this week!


Don't forget the guidelines for the linky:

  • Link only to your post dedicated to Texture Thursday not your main URL.
  • Anyone can join in at anytime.
  • Grab my button so others can find the linky and join in the fun too!
  • Try to visit others blogs and give some comment love! Because we all love comments.

****Also remember I will be posting all the photos I like through out the week on my FACEBOOK page and also on the Texture Thursday Pinterest Page. see if yours is one them****


THEDAILYWYATT

**I reversed the order of the link list so watch for your
thumbnail at the TOP of the list once you post it!**

Wednesday, November 9, 2011

Texture Thursday

Its Texture Thursday time!!
Everyone joining me from last week... Welcome back! And, if you're here for the first time, I hope you totally join in on the fun! The whole point of Texture Thursday is to look at photography from a different point of view. Meaning that you can either enter a photo that has texture already in it or add some of your own. If your not quite sure what I mean I give examples HERE.


Lately I have been showing you a lot of natural textures so this week I thought why not do a little tutorial.

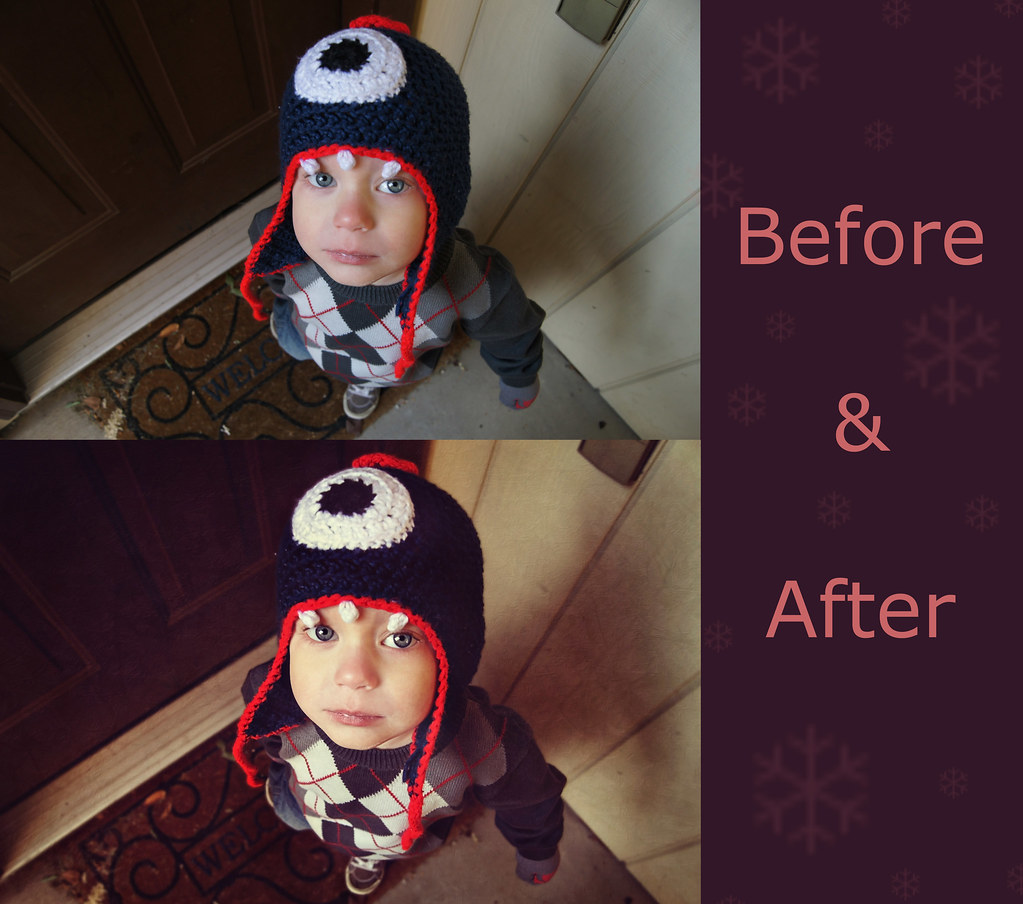
A before after

My SOOC shot was a little light and less dramatic than I like so first I did a clean edit (fixed the contrast levels etc.) then I added this texture:

Pressed_Leaves_Texture_2_by_FantasyStock

Which gave it that deep color. I of course erased the texture on his face and eyes did a color boost on it too. Plus sharpened the photo reduce the noise and was done.


HEY GUYS DID YOU KNOW YOU CAN ADVERTISE WITH ME FOR FREE!!! Check it out here:


Now the winner with the most likes is…

Homesick

Very dream like. Its lovely.

Congrats!

Grab your winner button HERE!


Now its your turn lets see what Textures you have this week!


Don't forget the guidelines for the linky:

  • Link only to your post dedicated to texture Thursday not your main URL.
  • Anyone can join in at anytime.
  • Grab my button so others can find the linky and join in the fun too!
  • Try to visit others blogs and give some comment love! Because we all love comments.
  • Come back and “like” your favorite texture!
THEDAILYWYATT
 
Linked too:
 and then, she {snapped}

**I reversed the order of the link list so watch for your
thumbnail at the TOP of list once you post it!**


Tuesday, November 1, 2011

Touch up Tuesday!

Check out my post over at the Paper Heart Camera

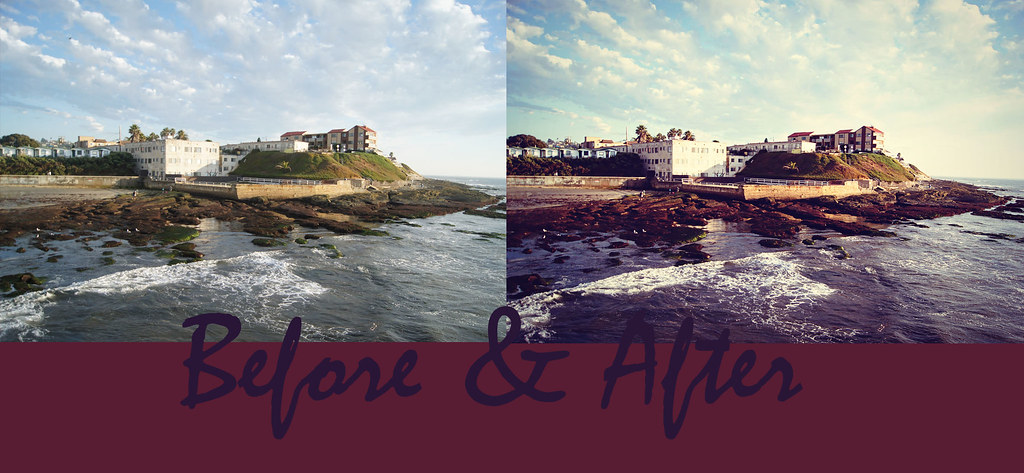
To see how I did this…

before&afterbeach

Touch Up Tuesday's at the Paper MamaPhotography love...

Tuesday, August 16, 2011

It will be like the best post you have ever read in your entire life! OH MY GOSH, Are you ready?!!?!?!?

So, yah. I was “forced” to not be on the computer this week (by week I mean like 3 days.) by my that husband of mine (which by the way he picked the laundry. Phish the easy one. lame.) because he says that I spend WAAAAAY tooooooo much time  (that was in his voice.) on it. Which I Toooooottalllllyyyyy disagree with.  (that was in my voice.) phish.

Which thanks to him, I am behind on all my clients edits, redoing my photog biz (which I am excited about.) all my personal edits, emails and well my sanity. gosh.

Today he told me that it didn't count because I was still on the ipad, Twitter, and facebook but I pointed out that I WASNT on the computer computer. so it didn't. SO THERE!

I win.

Any who, Since I didn't have time to get anything together to blog about like I wanted too (the kid wouldn't sleep.) I will share the one Personal picture I edited today and give you tips on the edit.
It will be like the best post you have ever read in your entire life! OH MY GOSH, Are you ready?!!?!?!?

BAM!
the picture:
beforeafterspidy
BAM!
The tips:
  • Do a “clean edit” (fix contrast levels etc.)
  • Use a boost action (from PW)
  • Add a texture (then you can link up your photo on Thursday for Texture Thursday. Wow, that's exciting.)
  • Erase the texture off the face/body
  • reduce the noise
  • sharpen
  • add copy write
  • then your done
  • its that easy
  • holy moly
  • wasn't that the best post ever!
  • OH MY GOSH, it was.
BAM!
The finished product:
bikeracecopy
I bet your wondering what we did and why Wyatt is sooooo freakin cute in that picture. (unless you follow me on FB/Twitter. You would already know but SHHHH…. dont tell anyone. Its gonna be a surprise!)

But I cant tell you YET! (cause the pics are not edited duh!)

You will just have to wait!

Can I also tell you that I am sooo looking forward to this weekend because I will be going on a mini vaca with my fam for my dad’s bday.

I sOOOOOOsososososososososooooooo soso so need it. (work sucks. DID you SEE the mess I was forced to clean this week! if not check it out  HERE!)
okay. I am done. I am going to bed. (by bed I mean watch court tv until I fall asleep on the couch because I drank way to much mt dew.)

Good night.
PhotobucketSweet Shot DayPhotography love...

Monday, July 25, 2011

I cheated. (a tutorial)

A before& after
After I posted this picture I got a lot of emails and comments on how to exactly do this shot so I thought I’d revel my secrets…. are you ready?!
This is not me spinning him.
(WHAAAAAAAAT?!?!?!)
It’s my sister. Before she spun him I wrapped my arms around her and pointed my camera down and then focused on Wyatt’s eyes. Then I counted to 3 and she and I both spun around as she held onto Wyatt.
My settings were f/3.5 1/25 ISO 200 but when I uploaded my picture I didn't like that you could see the people behind him so I edited it like this…
First I did a clean edit (adjust contrast levels etc.) Then I went into the Full edit mode (remember I use PSE8) added a little warmth with some actions.
I then concentrated  just the background. I used the quick selection tool and selected the background not my sisters arm or Wyatt’s face. then I went into the filters under the effect on the right side and choose the blur filter. Once in there I used the radial blur tool. (when using that tool make sure that you move the center to the area you DO NOT want to be blurred.) Had the amount at 22. This then made the background look like it was spun more. I also used the motion blur so it would even it all out.
I sharpened it, reduced the noise and was done.
Touch Up Tuesday's at the Paper Mama

Friday, July 15, 2011

A tutorial for Ashley

Ashley at Ramblings and Photos emailed me last night asking how I edit my photos into the B&W. Well Ashley since its the easiest edit I do I figured I will show you and everyone else just how I do it in 13 easy steps.
#1: Open a picture into your editing software. I edit with Photoshop Elements 8 and I use all FREE actions from PW and The Coffee shop. So I am not sure if other software has everything I use. FYI.
I then do a quick clean up of my photo by using the enhance auto levels or Shift+Ctrl+L (I don't use this for every photo I only do it if I am in a hurry.)
stepbystep
#2: I use the same step as above but do the contrast.
stepbystep1
#3: again the same step but do the color correction.
stepbystep2
#4: I then use one of The Coffee Shop’s FREE actions. Called S-Curve POP and then adjust the opacity to my liking.
stepbystep3
#5: I then used one of the Pioneer Women’s FREE Action called Edge burn and again adjust the opacity to my liking. (you don't always need to use this step but I did because I knew that by the end I wanted to have a dramatic frame around him.)
stepbystep4
#6: I then used another Pioneer action called Boost and adjusted the “Zing” opacity to my liking.
stepbystep5
#7: I then switch from “full” edit to “guide” edit and used the adjust skin tones and then used the eyedropper. I do this step because I noticed that it will give it a nice even tone on is face when its in B&W (the better your photo is the better it looks in B&W)
stepbystep6
#8: I then switch back to “full” edit mode and click on the “smart brush” tool on the left and choose the “photographic” option in the drop down menu then scroll down and pick the “instant photo” option and brush it on my entire photo. (YOU NEED TO DO THIS BECAUSE WHEN I SWITCH IT TO B&W THIS WILL MAKE IT NOT BE SO DARK!!)
stepbystep7
#9: You then can also change the opacity on it too.
stepbystep8
#10: I then use the “smart brush” tool again which it should still be in the “photographic” menu but then this time I scroll down to the “TIN TYPE” option. This is what will turn it into b&w. I brush it over the entire photo.
stepbystep9
#11: You can change the opacity on this also which I do some times to get vintage looking photos or you can use the + or – in the brushes and just highlight some of the photo. just play around with it.
stepbystep10
12: once I am done I ALWAYS!!!! reduce the noise because you just did a ton to the photo which WILL make it noisy. I don't have a noise software but I discovered that in the filters (which you see I circled on the top over there on the right.) that they have an action for you called “Noise” I click into…
stepbystep11
#13: You want to use the last action in there called “reduce noise” it will pop up this box and DEPENDING on how much noise is on the photo you will want to adjust the COLOR NOISE and/or strength. (don't mess with the middle one TRUST me.) the box will show you what it will make your photo look like DONT over do it. because then your photo will look like poo. Click ok when you like it.
stepbystep12
That’s it! SOOO simple. and it makes a pretty cool B&W right?
before&after
Now I use a lot of the smart tool options, my favorites are:
1. Tin Type
2. Instant photo
3. Neutral tone B&W
(those are all in the photographic menu.)
4. Cool tone B&W (which is in the Black and White Menu.)
5. I use all the ones in the Lighting menu
Let me know if you have any questions!


and then, she {snapped}Give me your best shot at Better in BulkPhotoStory Friday

Thursday, May 26, 2011

Before & After


So since I stayed up so late watching YouTube Videos instead of getting my Texture Thursday ready I told you I'd do a before and after today... So as promised...
beforeafter
Here is a shot I took yesterday of Wyatt. I do an officially mini shoot with him and I am totally going to print them out and hang them on my wall this time!! I swear! plus I told the hubster that he has a month to get over his fear of not waiting his picture taken because I WILL be doing a family shoot of us! ugh...
Anyways with this photo I first did a clean edit which is where I fix contrast levels etc. Then I did boosted a colors a bit with some actions from coffee shop. Then I added a texture and erased it from his face/hands sharpened and was done. Simple but lovely.
So if you haven't linked up yet please do... the whole point of Texture Thursday is to look at photography from a different point of view. Meaning that you can either enter a photo that has texture already in it or add some of your own. If your not quite sure what I mean I give examples HERE
Don't forget the guidelines for the linky:
  • Link only to your post dedicated to texture Thursday not your main URL.
  • anyone can join in at anytime.
  • Grab my button so others can find the linky and join in the fun too!
  • try to visit others blogs and give some comment love! Because we all love comments. ;)
You can link up to this post or Last nights post. either way!
The Daily Wyatt
Also linking up too: Touch up Tuesday & Before and After.

Wednesday, April 27, 2011

Touch up Tuesday/Thursday

Main Edited:
SONY DSC
       Original:                                  Vintage b&w edit:
SONY DSC                       SONY DSC                        
With this photo of Ellie's senior session I wanted to make it soft and simple.
How I did that was first do a clean edit... (fix contrast levels reduce any noise etc.) Then I went in and soften the skin with the Coffee shops powder room2 action. Once that was to my liking I then went in and softened her hair brighten her eyes reduced any noise sharpened and was done.
then I thought it might look girl with a vintage b&w flare. How I did that was in Photoshop 8 I used the smart brush tool went into the photographic section choose tin type covered the whole photo and reduced the opacity to just show a slight color in the flower. fixed the levels a little and was done. 
While your at it can I get a vote?
Click To Vote For Us @ the Top Baby Blogs Directory! The most popular baby blogs